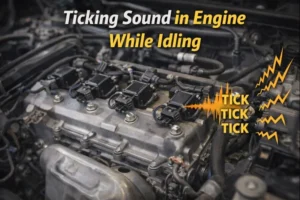
A pressure test is one of the most reliable ways to diagnose cooling system problems without tearing the engine apart. If your vehicle is losing coolant, overheating, or leaving unexplained puddles under the car, a pressure test helps you find leaks early—before they turn into costly engine damage.
Unlike guessing based on symptoms, pressure testing recreates normal operating pressure while the engine is off and cool. This makes leaks easier to spot, safer to inspect, and far more accurate than visual checks alone.
With the correct approach and a simple tool, most car owners can perform this test at home. This guide walks you through exactly how to pressure test a cooling system, what the results mean, and how to avoid common mistakes that lead to misdiagnosis.
What Is a Cooling System Pressure Test?
A cooling system pressure test involves sealing the system and applying controlled air pressure—usually equal to the radiator cap rating.
Because the cooling system is designed to be airtight, any pressure loss indicates a leak, even if coolant doesn’t visibly drip during normal driving.
A healthy system should hold pressure steadily for several minutes. A drop in pressure means coolant is escaping somewhere, either externally (hoses, radiator, water pump) or internally (head gasket, heater core).
When You Should Pressure Test the Cooling System
Pressure testing is recommended if you notice:
- Coolant level dropping repeatedly
- Engine overheating or running hotter than normal
- Sweet coolant smell from the engine bay
- White or crusty residue near hoses or radiator seams
- Wet spots under the vehicle after parking
- Weak or inconsistent cabin heat
It’s also smart to pressure test after replacing cooling components like a radiator, thermostat, or water pump to confirm the system is sealed correctly.
Safety Checks Before You Start
Before touching the cooling system:
- Make sure the engine is completely cold
- Wait at least 1–2 hours after driving
- Wear gloves and eye protection
- Never exceed the pressure rating printed on the radiator cap
Skipping these steps can result in burns, damaged hoses, or cracked plastic components.
Step-by-Step: How to Pressure Test a Cooling System
Step 1: Locate the Radiator Cap or Coolant Reservoir Cap
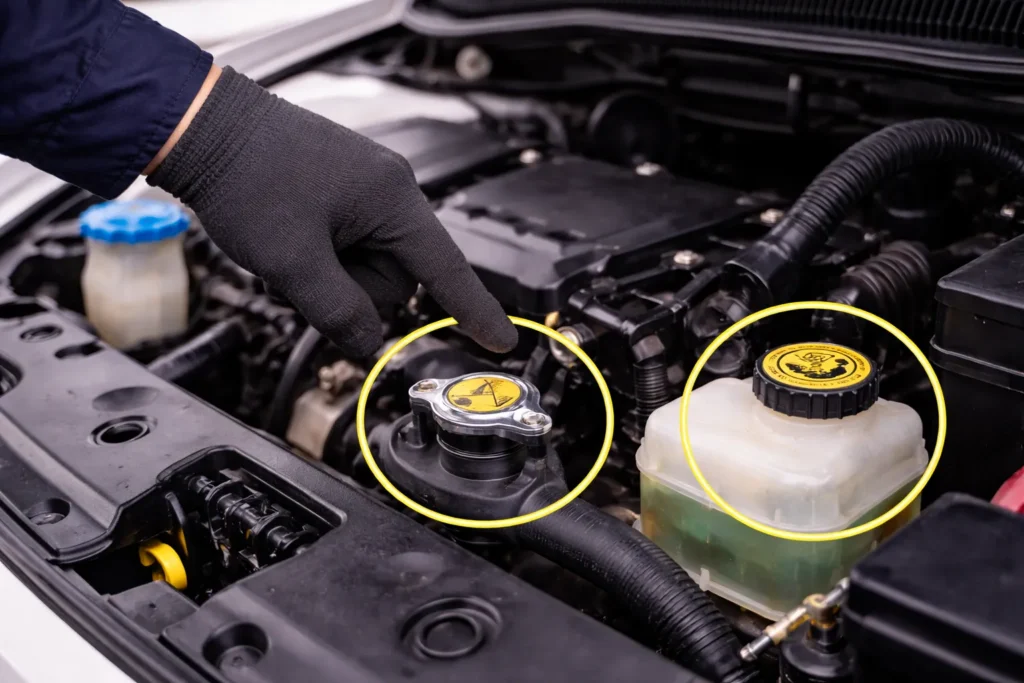
Older vehicles usually have a radiator cap directly on the radiator. Many modern vehicles use a sealed system with a pressurized coolant reservoir.
Slowly remove the cap. If you hear pressure escaping, stop and wait longer—the engine may not be fully cooled.
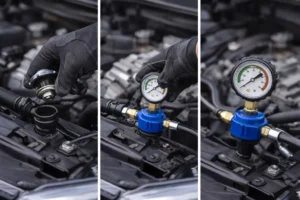
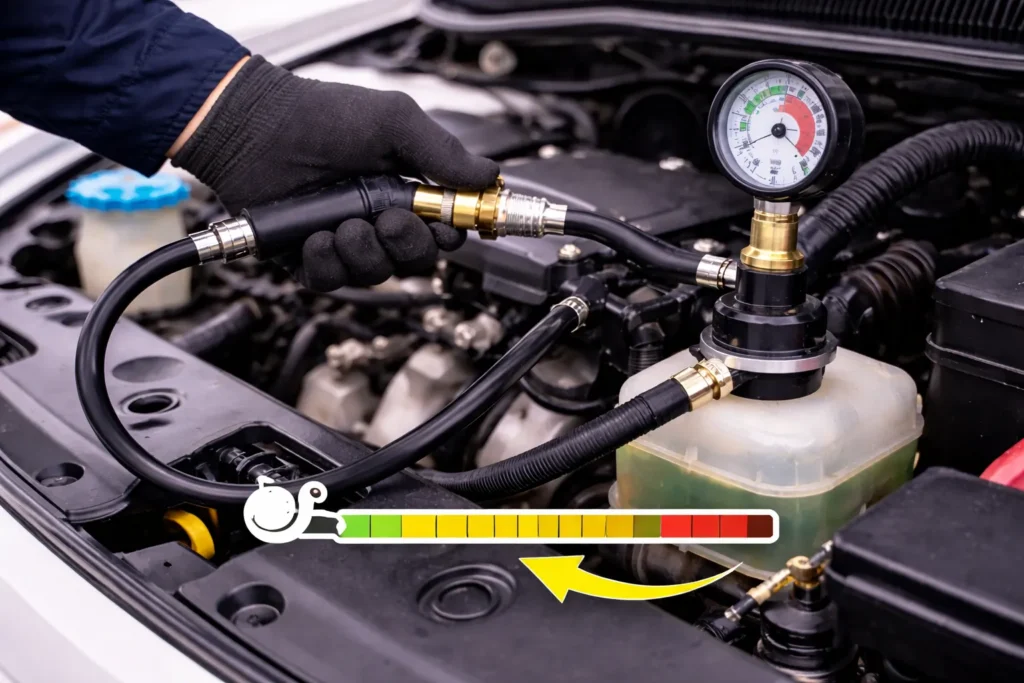
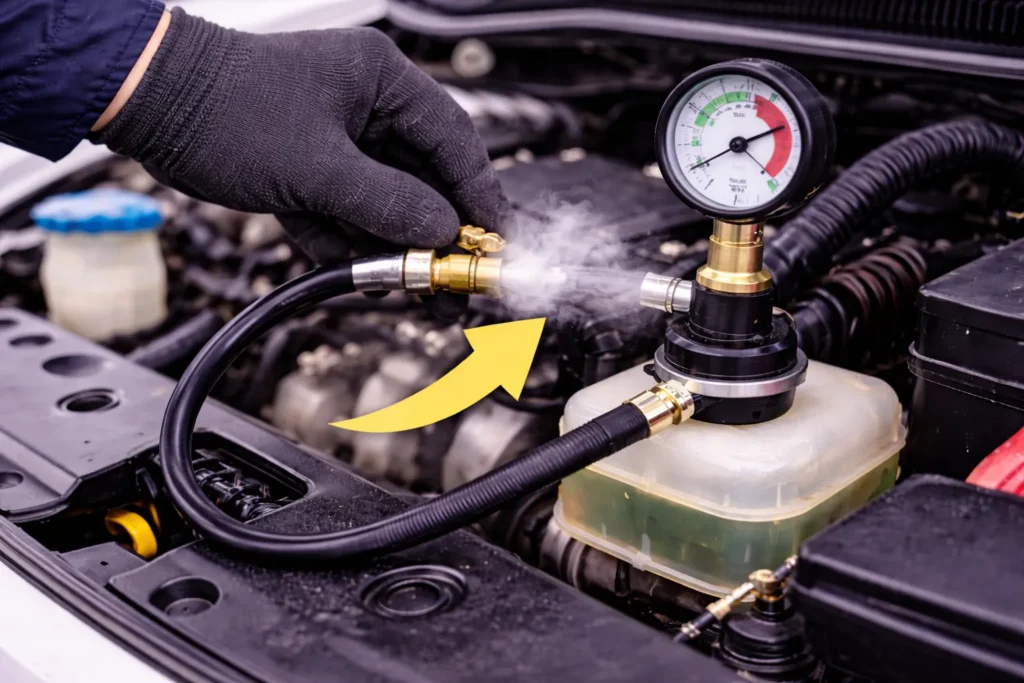
Step 2: Attach a Cooling System Pressure Tester
At this stage, you need a tool that can safely apply pressure and measure whether the system holds it.
A widely used option is the Orion Motor Tech Coolant Pressure Tester. This kit includes multiple adapters designed to fit both radiator necks and pressurized coolant reservoirs, which is important because poor fitment can cause false pressure loss.
The hand pump allows you to:
- Apply pressure gradually
- Control PSI accurately
- Monitor leaks without running the engine
Attach the correct adapter firmly and ensure it seals tightly before pumping.
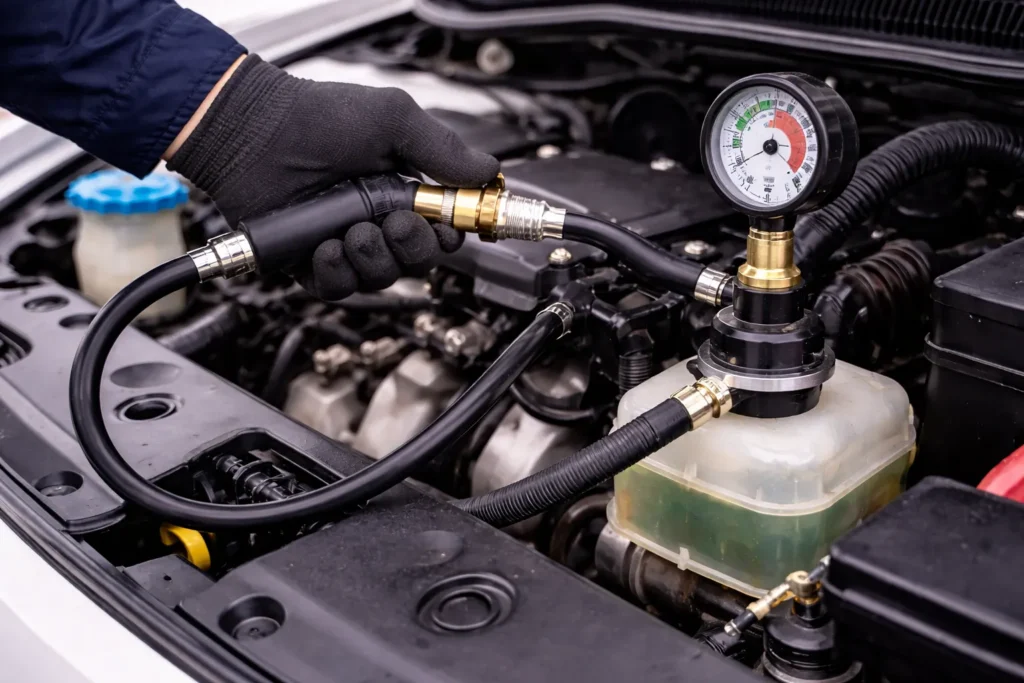
Step 3: Apply Pressure Gradually (Do Not Rush)
Begin pumping the tester slowly while watching the gauge.
Stop once you reach the pressure rating listed on the radiator cap—commonly 13–16 PSI for most passenger vehicles.
Applying pressure too quickly can:
- Stress old hoses
- Crack plastic tanks
- Damage radiator seams
Slow, controlled pressure is key to accurate results.
Step 4: Verify Pressure Accuracy (Optional but Helpful)
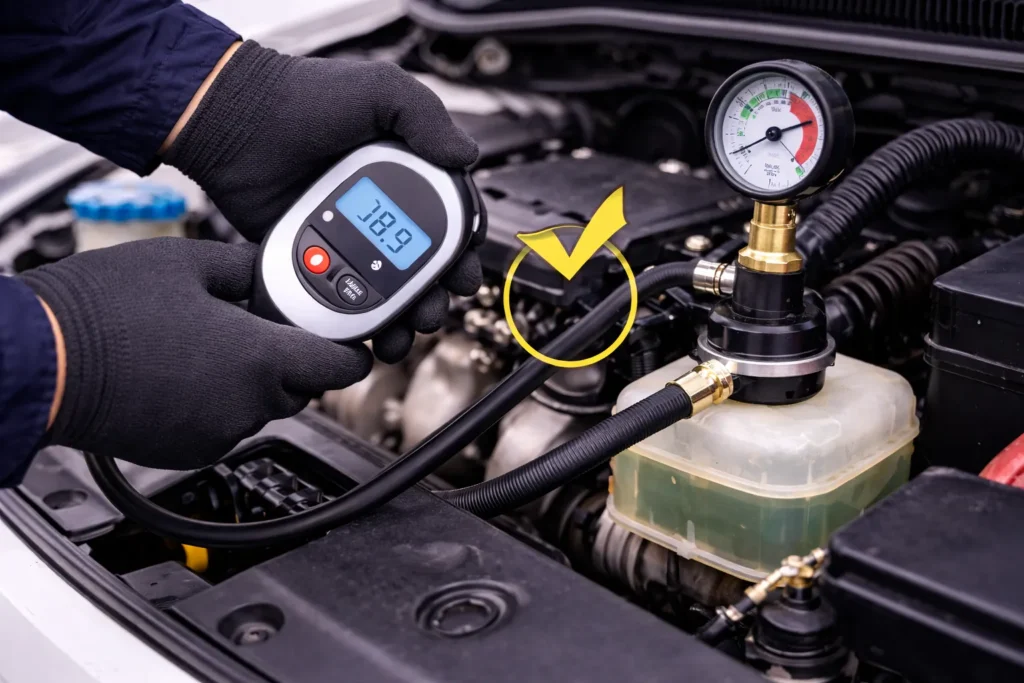
If the pressure gauge on your tester is hard to read or you want extra confidence, this is where a digital gauge helps.
A simple tool like the ETENWOLF T300 Digital Tire Pressure Gauge can be used to double-check PSI readings. While designed for tires, its accuracy makes it useful for confirming test pressure—especially on older testers or budget kits.
This step helps prevent:
- Over-pressurizing the system
- Testing at too low a PSI (which can hide small leaks)
Step 5: Monitor the Pressure Gauge Closely
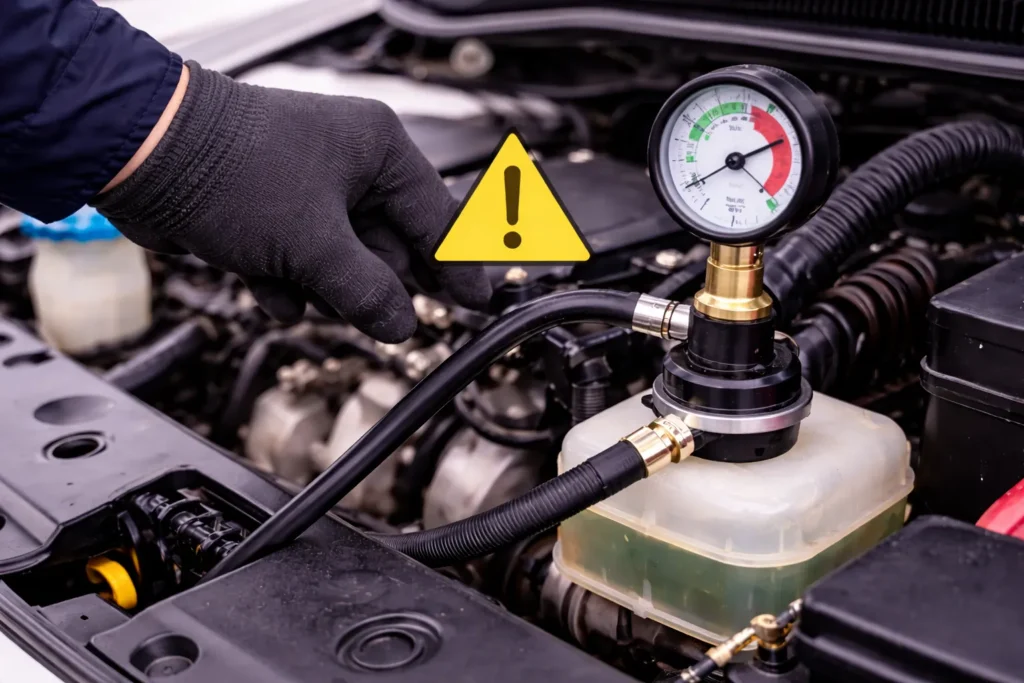
Once pressurized, stop pumping and observe the gauge for 5–10 minutes.
- Stable pressure: System is sealed
- Slow pressure drop: Small leak or weak component
- Rapid pressure loss: Major leak
A small initial drop is normal as hoses expand, but pressure should stabilize quickly.
Step 6: Inspect for External Leaks Under Pressure
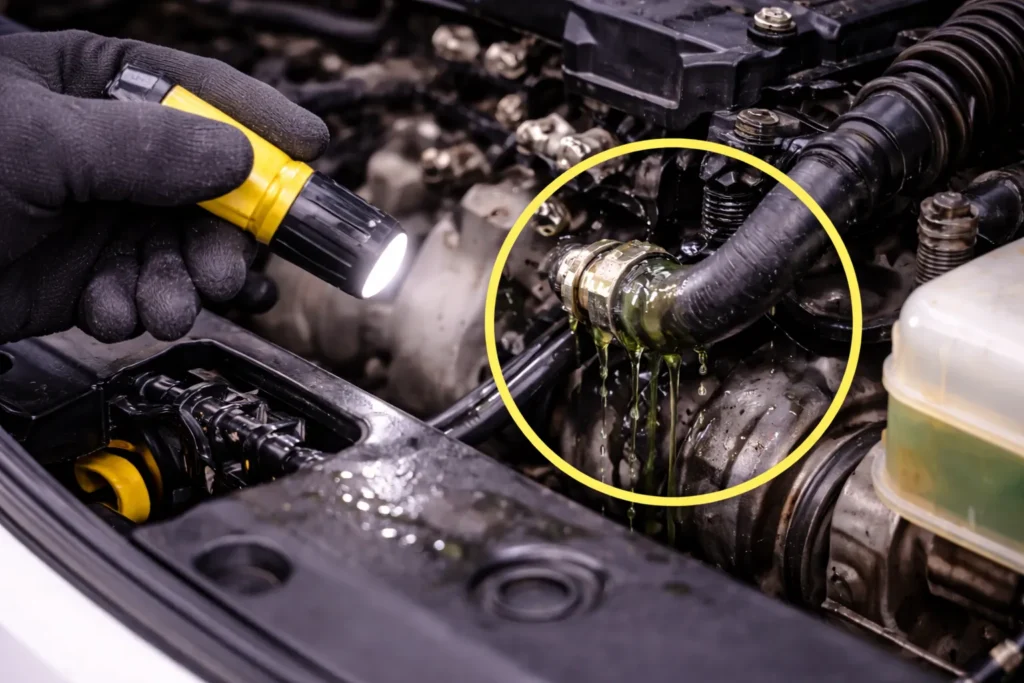
With the system pressurized and the engine off, inspect carefully:
- Radiator tanks and seams
- Upper and lower radiator hoses
- Heater hoses at the firewall
- Thermostat housing
- Water pump weep hole
- Coolant reservoir
- Hose clamps and plastic fittings
Look for:
- Drips or wet spots
- White, green, or orange residue
- Hissing sounds
This step is where pressure testing shines—many leaks only appear under pressure and won’t show during idle.
Step 7: Check for Signs of Internal Leaks

If pressure drops but no external leaks are visible, check for internal symptoms:
- Milky residue on the oil dipstick
- Coolant smell from exhaust
- Coolant disappearing with no visible leaks
- Bubbles in the radiator neck (engine off, cap removed)
These signs may indicate a head gasket or heater core issue, which requires further diagnosis.
Step 8: Release Pressure and Reassemble
Use the pressure tester’s relief valve to release pressure slowly.
Remove the adapter and reinstall the radiator or reservoir cap securely.
Never remove the tester while the system is still pressurized.
How to Interpret Your Results
| Test Result | Likely Cause |
| Pressure holds steady | Cooling system is sealed |
| Slow pressure loss | Minor leak or aging hose |
| Rapid pressure loss | Major external leak |
| Pressure loss with no visible leak | Possible internal issue |
If pressure loss is minor, recheck hose clamps and inspect the radiator cap—bad caps are a common and inexpensive failure point.
Common Mistakes That Lead to Wrong Diagnosis
- Testing with a warm engine
- Exceeding cap pressure rating
- Ignoring slow pressure loss
- Assuming no leak means no problem
- Forgetting to reinstall the cap correctly
Taking your time during the test prevents misdiagnosis.
How Often Should You Pressure Test?
- When coolant loss is suspected
- After cooling system repairs
- Before long road trips
- When buying a used vehicle
Routine pressure testing can save thousands in engine repair costs.
Real Takeaway
Pressure testing a cooling system is one of the most valuable diagnostic skills a car owner can learn. It’s safe, accurate, and far more reliable than guessing based on symptoms alone. With a quality pressure tester and a careful inspection, you can detect leaks early, protect your engine, and avoid unnecessary repairs.
For anyone who works on their own vehicle, this is a test—and a tool—that pays for itself quickly.