When a car’s air conditioner stops cooling properly, many people immediately assume the AC compressor has failed. In reality, compressor replacement is often done without proper testing, even though the real cause may be low refrigerant pressure, an electrical fault, a bad relay, or a sensor issue.
Testing the compressor before replacing it is important because AC repairs can be expensive and unnecessary work can be avoided. This guide explains how to test a car AC compressor at home using a clear, logical process.
Each step helps you understand what is working, what is not, and whether the compressor itself is actually the problem or if something else in the system needs attention.
What the AC Compressor Does
The AC compressor is the main component responsible for:
- Compressing refrigerant gas
- Circulating refrigerant through the AC system
- Allowing heat to be removed from the cabin air
If the compressor does not engage or cannot maintain pressure, the AC system will not cool effectively.
Common Symptoms of AC Compressor Problems
Before testing, note any symptoms you are experiencing:
- Warm or weakly cool air from the vents
- AC works intermittently
- Clicking, grinding, or squealing noises when AC is turned on
- Compressor clutch does not engage
- Cooling improves only while driving
These signs help determine which tests are most important.
Safety Precautions
- Park the vehicle on a level surface
- Engage the parking brake
- Keep hands, tools, and clothing away from belts and fans
- Never open refrigerant lines
The steps below focus on external testing only.
Tools You May Need
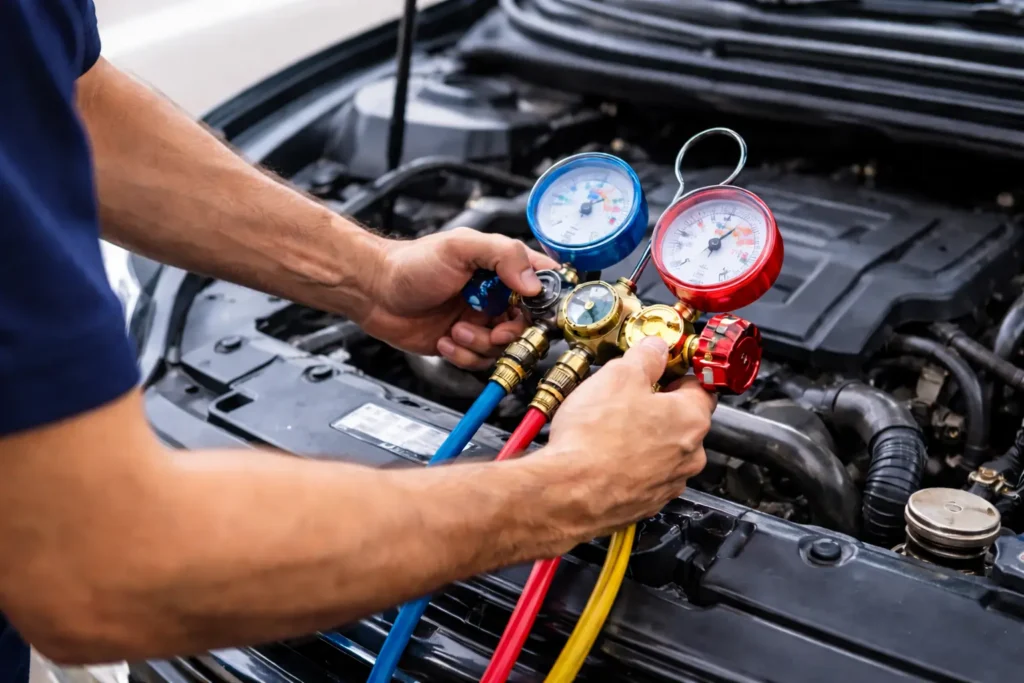
AC Pressure Gauge (Refrigerant Check)
Low refrigerant pressure is one of the most common reasons an AC compressor will not turn on. Many vehicles disable compressor operation automatically when pressure is too low to prevent damage.
A basic gauge set such as the Professional A/C Air Conditioner Manifold Gauge Kit allows you to check low-side pressure easily. It has clear dials and is suitable for basic home diagnostics without professional equipment.
Digital Multimeter (Electrical Check)
If the compressor clutch does not engage, electrical testing is necessary. A multimeter helps confirm whether power is reaching the compressor or if the issue is elsewhere in the circuit.
The Klein Tools Digital Multimeter is commonly used for automotive troubleshooting. It is simple to operate and useful for testing voltage, fuses, relays, and wiring.
Step-by-Step Guide
Step 1: Check Basic AC Operation
- Start the engine
- Set the AC to MAX
- Set the fan speed to high
- Select the coldest temperature setting
Observe whether the AC indicator light turns on and whether engine idle changes slightly when the AC is engaged. No change may indicate the compressor is not receiving a command to turn on.
Step 2: Inspect Fuses and Relays
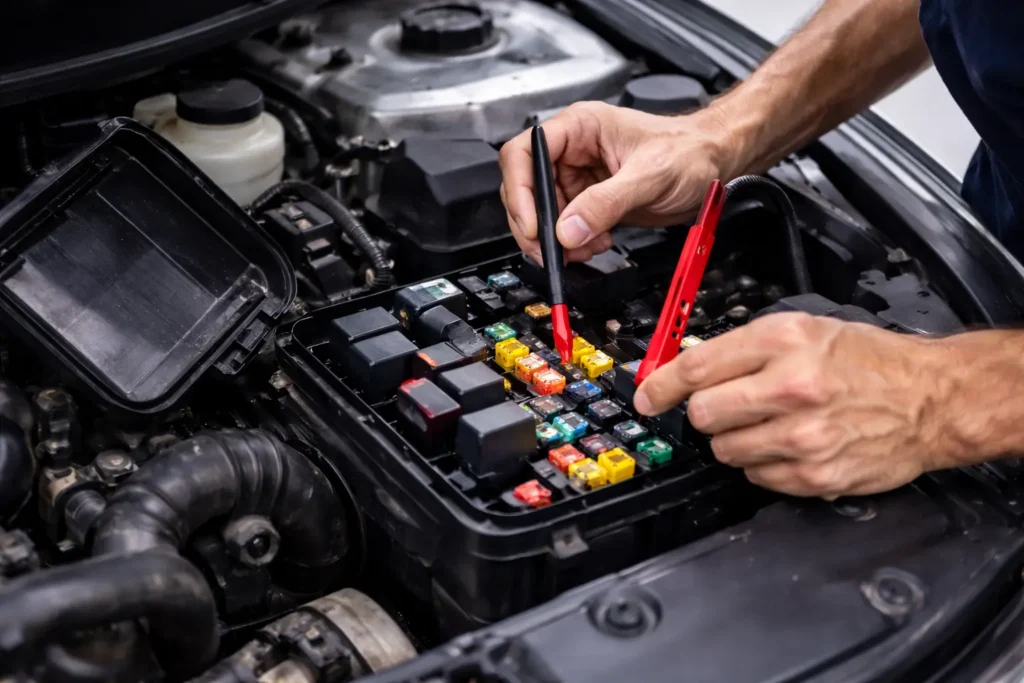
Electrical control issues are common and easy to overlook.
- Locate the fuse box (engine bay or interior)
- Check the AC fuse
- Swap the AC relay with another identical relay, such as the horn or fan relay
A faulty relay can prevent compressor engagement even if the compressor itself is functional.
Step 3: Visually Inspect the AC Compressor

With the engine off, locate the AC compressor under the hood.
Check for:
- Oil residue or wet spots (possible refrigerant leak)
- Loose or damaged wiring
- Worn or slipping serpentine belt
Leaks or belt issues can stop the compressor from operating correctly.
Step 4: Check Compressor Clutch Engagement
This is one of the most important tests.
- Start the engine
- Turn the AC on
- Observe the front of the compressor
Normal operation:
- The outer pulley spins continuously
- The center clutch plate clicks and spins when the AC is on
Results:
- Clutch engages → compressor is receiving power
- Clutch does not engage → possible low refrigerant, electrical fault, pressure switch issue, or clutch failure
Step 5: Check Refrigerant Pressure
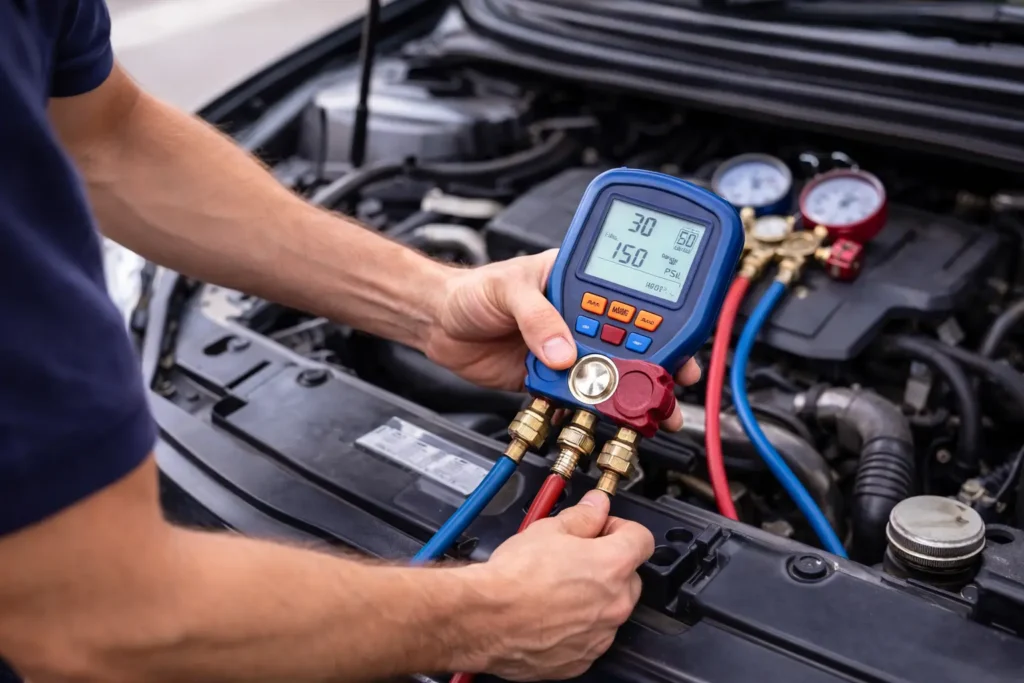
Low pressure can prevent the compressor from engaging.
- Connect the low-side hose from the Professional gauge to the low-pressure service port
- Start the engine
- Turn the AC to MAX
- Read the pressure
Typical low-side pressure:
- Approximately 25–45 PSI, depending on vehicle and ambient temperature
Very low or zero pressure usually disables compressor operation for safety reasons.
Step 6: Listen for Abnormal Noises
With the AC running, listen closely.
Normal sounds:
- Smooth engagement
- No grinding or knocking
Warning signs:
- Loud clicking
- Grinding or metal-to-metal noise
- Belt squeal when the AC turns on
Grinding noises often indicate internal compressor wear.
Step 7: Check Electrical Power at the Compressor
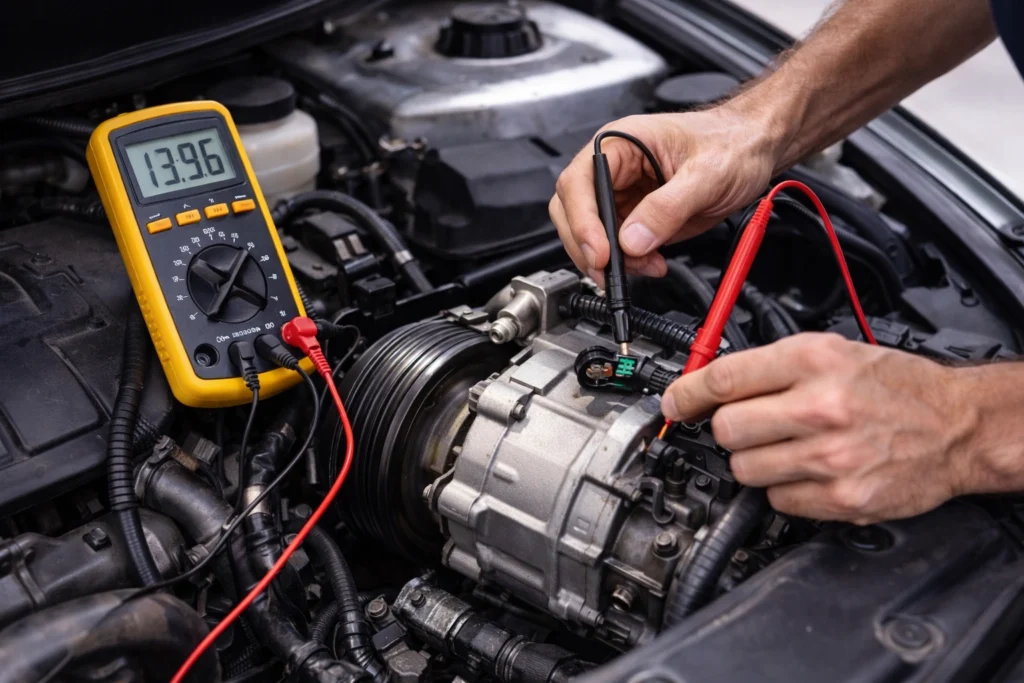
If the clutch does not engage, confirm whether power is reaching the compressor.
- Disconnect the compressor electrical connector
- Set the Klein Tools multimeter to voltage mode
- Turn the AC on
- Check for voltage at the connector
Interpretation:
- Voltage present but clutch does not engage → faulty clutch or compressor
- No voltage → wiring, relay, fuse, or pressure switch issue
Step 8: Check Vent Temperature

This final check helps confirm system performance.
- Run the AC for 5–10 minutes
- Check the air temperature coming from the vents
Results:
- Cold air briefly, then warm → compressor cycling or pressure issue
- Always warm air → compressor or refrigerant problem
When the Compressor Is Usually Not the Problem
Many AC issues are caused by:
- Refrigerant leaks
- Faulty pressure switches
- Bad relays
- Electrical wiring faults
Testing step by step helps avoid unnecessary compressor replacement.
When the Compressor Is Likely Faulty
Replacement becomes more likely if:
- The clutch receives power but does not engage
- Pressure readings are abnormal with correct refrigerant levels
- Loud internal noises are present
- Cooling performance never improves
Final Thoughts
Testing a car AC compressor at home requires patience and a structured approach rather than guesswork. By checking refrigerant pressure, clutch engagement, electrical supply, and system behavior, you can determine whether the compressor is actually at fault or if another component is causing the issue.
Basic tools like the AC pressure gauge and digital multimeter help make accurate decisions and can prevent unnecessary repair costs.