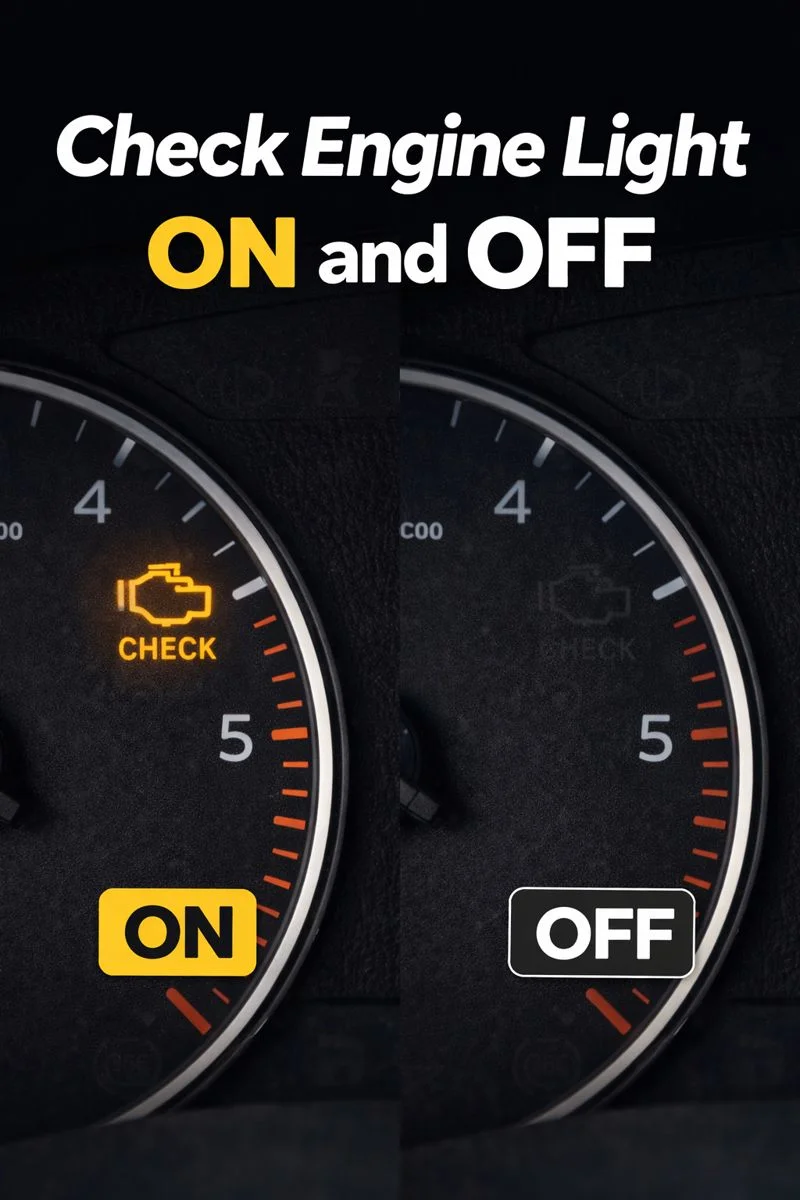
The check engine light is one of the most misunderstood warnings on a car dashboard, yet it’s also one of the most useful.
This guide explains clearly why the light comes on and why it sometimes goes off by itself, how the car’s computer decides when to warn you, and what practical steps you can take so the light doesn’t become a mystery — or a money pit.
You’ll find simple diagnostics anyone can try, safe troubleshooting steps, realistic repair timelines, and what to expect if you take the car to a professional.
I’ve combined real-world experience with official guidance so the advice you read is both practical and grounded in how modern vehicles are built and tested.
By the end you’ll understand the difference between a temporary glitch and a real fault, and how to act responsibly for safety, emissions, and long-term reliability.
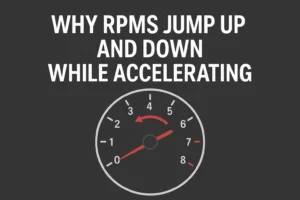
What The Check Engine Light Is And What It Watches
The check engine light — formally called the Malfunction Indicator Lamp or MIL — is the vehicle’s indicator that the onboard computer has detected an emissions-related or engine-control problem.
Since the mid-1990s most cars have an OBD-II system that continuously monitors sensors and emission systems. When something operates outside expected limits, the computer stores a diagnostic trouble code (DTC) and usually illuminates the light.
The lamp is the car’s way of asking for attention, not necessarily a signal of immediate doom.
Why The Light Sometimes Turns On And Then Turns Off
Modern cars perform repeated checks of many systems. A fault can be intermittent — for example a momentary sensor glitch, a fuel vapor leak that closes on its own, or poor fuel quality that clears after a tank change.
If the condition does not reappear during subsequent checks, many vehicles will automatically clear the stored fault and switch the light off after one or more successful drive cycles.
In other words: the car tested, the problem did not persist, and the system marked the issue as resolved. This self-clearing behavior is deliberate and helps avoid unnecessary repairs for transient conditions.
Steady Light Versus Flashing Light: The Critical Difference
A steady check engine light typically indicates a non-immediate fault that should be diagnosed and repaired soon. A flashing light, by contrast, usually signals a severe problem — commonly an engine misfire — that risks damaging the catalytic converter and other components.
If the light is flashing, you should reduce engine load and get to a repair facility promptly. Treat a flashing lamp as urgent.
Common Causes For The Light Coming On
- Loose Or Damaged Gas Cap: The EVAP (evaporative emissions) system is sensitive; a loose or cracked cap can cause an emissions-leak code and a lit MIL.
- Faulty Oxygen Sensor Or Mass Airflow Sensor: These sensors influence fuel trims and emissions; drift or failure triggers codes.
- Ignition Problems (Plugs/Coils): Misfires from worn plugs or faulty coils can produce codes and, if severe, a flashing light.
- Catalytic Converter Issues: When the converter is failing, multiple codes or performance loss may appear.
- Intermittent Sensor Glitches And Temporary Fuel Problems: Fuel quality, moisture, or wiring corrosion can cause brief faults that later clear.
Why The Light Might Go Off By Itself (Drive Cycle Reset)
Most vehicles require one or more drive cycles to complete their self-tests. A drive cycle typically includes cold start, steady cruising, and idle phases so the computer can test emissions systems and catalysts.
If a transient problem is gone and the monitors complete successfully during the required cycles, the stored fault can be cleared automatically and the light will turn off.
State inspection programs track “readiness monitors” and expect them to be complete; clearing codes or disconnecting the battery will usually reset readiness status and require drive cycles to set them again.
How To Find Out Why The Light Came On (Quick Steps)
- Check For A Flashing Light — If it’s flashing, limit driving and seek service.
- Look For Obvious Things — Tighten the gas cap, check for loose hoses, listen for misfires.
- Use An OBD-II Scanner — A basic reader will show the stored code(s) and allow you to clear codes after repair.
- Research The Code — Manufacturer codes can have specific meanings; use a reputable source or service manual.
- Decide DIY Or Professional Repair — Simple fixes like a cap or spark plug can be done yourself; complex or multiple codes often need a shop.
Using An OBD-II Scanner Correctly
An OBD-II scanner is the most reliable tool to learn why the MIL lit. Plug the scanner into the diagnostic port (usually under the dash on the driver side), read the codes, write them down, and look up their meaning.
After you fix the underlying issue, use the scanner’s “Clear Codes” function — this tells the ECU to erase stored faults and attempt the monitors again.
Scanners are inexpensive and far less disruptive than disconnecting the battery; they also preserve vehicle settings and perform a proper code clean.
The Battery Disconnect Myth: Why It Works And Why It’s Not Recommended
Disconnecting the negative battery cable for a period can clear certain volatile memory and turn the light off. That works because loss of power resets some non-persistent data.
However, disconnecting the battery also erases radio presets, clock settings, and more importantly sets readiness monitors to “not ready” — which can prevent passing an emissions inspection until the car completes the required drive cycles.
Since disconnecting doesn’t repair the root cause, the light may return, and you can waste time trying to reestablish readiness. Using a scanner to clear codes after repair is the more responsible choice.
Step-By-Step Troubleshooting Guide You Can Follow
Step 1 — Safety Check
If the lamp is flashing, stop driving if safe and seek service. If steady, continue with these steps.
Step 2 — Visual Inspection
Open the hood. Look for loose vacuum hoses, oil or coolant leaks, damaged wiring near sensors, or a loose gas cap.
Step 3 — Read Codes
Use an OBD-II reader. Record codes and any freeze-frame data (conditions when fault was stored).
Step 4 — Interpret Codes
Look up generic code meanings and manufacturer specifics. Don’t assume; cross-check with a reliable repair guide.
Step 5 — Fix The Easily Verifiable Items
Tighten or replace the gas cap, replace a visibly damaged vacuum hose, or change a stuck air filter.
Step 6 — Repair Or Replace Faulty Parts
If codes point to sensors, plugs, or coils, replace them using OEM or high-quality aftermarket parts and correct torque/connection procedures.
Step 7 — Clear Codes And Test
Clear codes with the scanner. Drive the car through the required cycles and re-scan. If codes return, further diagnosis is needed.
When The Light Comes And Goes Without Codes
Occasionally the light will blink on the dash but leave no stored code, or it will go out on its own. This can occur when a pending code never progressed to a stored code; the computer tested the system again and didn’t find a fault.
It can also happen after a battery disconnect or software update. If the behavior repeats, record when it happens (temperature, speed, wet weather) and have the vehicle scanned — intermittent issues are often wiring or connector related.
Readiness Monitors And Why They Matter
Readiness monitors are the computer’s internal tests for emission systems. After codes are cleared or battery power is lost, many monitors show “not ready” until the vehicle completes a set of drive cycles.
Emissions inspections often require specific monitors to be “ready.” That means even if you cleared the light, an immediate inspection might fail because the system hasn’t had time to re-test.
If your state requires emissions testing, avoid clearing codes or disconnecting the battery right before inspection.
Real Facts
Federal emissions regulations and the OBD system require vehicles to monitor emissions-related components and to set the Malfunction Indicator Lamp when failures occur.
That requirement forms the basis of modern onboard diagnostics and emissions enforcement programs — in short, the check engine light is an emissions-control safeguard, not just a generic warning. (See EPA documentation on OBD testing and readiness guidance.)
Practical DIY Fixes That Often Work
- Tighten Or Replace Gas Cap: Inspect the seal and threads. A new cap is inexpensive and commonly resolves EVAP codes.
- Replace Spark Plugs Or Coils: If misfire codes appear and parts are worn, replacement can be straightforward.
- Clean Or Replace MAF Sensor: Dirt in the air intake can cause fuel-trim problems; cleaning often helps.
- Check Wiring And Connectors: Corrosion, rodents, or heat can damage wires; secure and repair connectors.
- Address Vacuum Leaks: Rubber hoses age; replace cracked lines that cause lean-condition codes.
When To Stop DIY And See A Professional
- The light is flashing and you are not confident diagnosing a misfire.
- Multiple codes appear or codes point to complex systems (timing, catalytic converter).
- You lack a scanner and the code returns after basic fixes.
- Your car fails an emissions test despite repairs. A shop can use manufacturer level tools and technical bulletins to pinpoint tricky issues.
Costs And Timelines: Realistic Expectations
Costs vary by cause. A new gas cap is typically inexpensive; ignition coils or oxygen sensors are moderate cost and often DIY-friendly. Catalytic converter replacement is expensive and usually the priciest repair that causes MIL illumination.
Time to fix ranges from minutes (tighten cap) to days (diagnosing intermittent faults). If the light clears on its own, that sometimes indicates a transient event and no repair cost — but if the light returns, expect to spend diagnostic time to prevent repeat visits.
Preventive Tips To Reduce False Or Repeated MIL Events
- Regularly service ignition components and filters.
- Use quality fuel and avoid topping off the tank past the nozzle shutoff.
- Keep the gas cap clean and replace it if seals harden or crack.
- Address check engine lamp issues promptly; small problems often become larger and costlier if ignored.
- Keep a basic OBD-II reader handy — early reading prevents guesswork and unnecessary parts replacement.
Sample Drive Cycle To Set Readiness Monitors (General Guidance)
Manufacturers differ, but a common sequence to help reset monitors includes: a cold start, idling for a short time, driving at a steady highway speed for several minutes, and varying speeds with light acceleration.
Check your vehicle manual or state DMV guidance for the exact sequence for your car. Remember monitors often require multiple cycles to report “ready.”
Frequently Asked Questions
Q: Can I Ignore A Steady Check Engine Light?
A: It’s not an emergency but it should be diagnosed soon. Ignoring it can lead to poorer fuel economy, higher emissions, or cascading failures.
Q: Why Did The Light Turn Off Without A Repair?
A: The vehicle’s self checks found the condition no longer present and cleared the pending code after successful drive cycles.
Q: Will Clearing Codes Hide Problems From A Mechanic?
A: Clearing codes only erases stored data; it does not fix the issue. Technicians prefer to see codes and freeze-frame data to properly diagnose intermittent faults.
Q: How Many Drive Cycles Until Monitors Are Ready?
A: It varies by monitor and manufacturer; typically a few days of normal driving or several specific cycles. Consult manufacturer guidance for exact details.
Checklist: What To Do When The Light Comes On
- Note Whether The Light Is Steady Or Flashing.
- Tighten Gas Cap And Check Obvious Items.
- Read Codes With An OBD-II Scanner.
- Research The Codes And Plan Repairs.
- Fix Simple Items Yourself Or Book A Shop Appointment.
- Clear Codes With A Scanner After Repair.
- Drive Normally For Several Cycles And Re-Scan.
- If The Problem Persists, Seek Professional Diagnosis.
Closing Thoughts
The check engine light is a tool — a smart early warning system that helps protect engines, emissions systems, and other critical components.
Understanding why it comes on, why it sometimes goes off by itself, and how readiness monitors work will keep you from overreacting or, worse, ignoring a real problem.
Use a scanner, fix what’s practical, and consult a professional when the fault is complicated or the lamp is flashing. With sensible steps and the right information, the check engine light becomes less a source of anxiety and more a reliable guide to maintaining a healthy car.